What Garage Door Weatherstripping Actually Does
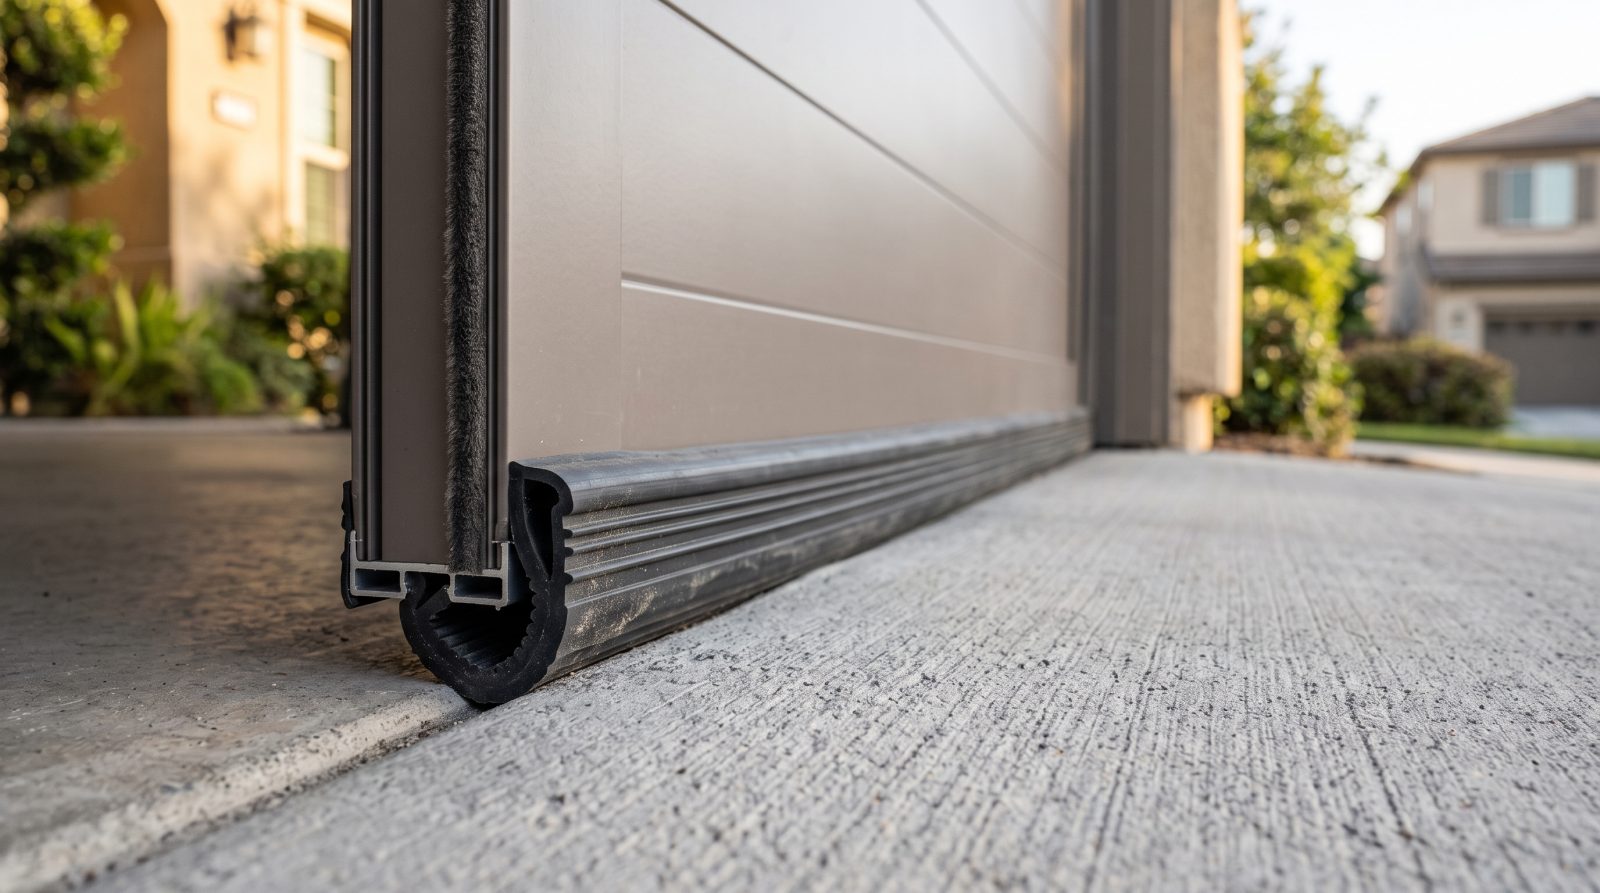
Weatherstripping is the collective name for the flexible barriers installed everywhere your garage door meets the surrounding structure. There are four main locations, and each one does a different job. The bottom seal (also called a door sweep, U-astragal, or bottom gasket) runs along the very bottom of the door and seals against the garage floor. The side or jamb seals run vertically up both sides of the opening. The top seal runs across the header. And between each horizontal door section, on a sectional garage door, there are flexible joint seals that flex as the door bends around the curve of the track.
Together these seals form a continuous envelope. When that envelope is intact, your garage stays dramatically drier, cleaner, and more comfortable. Weatherstripping is also one of the most overlooked parts of home energy efficiency: an attached garage shares walls and often a doorway with the living space, so cold or hot air that leaks in under the door does not stop at the garage, it migrates into the house. Replacing failed seals is one of the cheapest comfort and efficiency upgrades a homeowner can make.
It is worth understanding what weatherstripping cannot do. It is a weather and pest barrier, not a structural or security component, and it is not load-bearing. If your door is hard to open, slamming shut, hanging crooked, or making grinding noises, that is not a weatherstripping issue. Those are signs of springs, cables, rollers, or track problems, which are separate systems and, in some cases, genuinely dangerous to touch. We will come back to that distinction, because it matters for your safety.
- Bottom seal: seals the gap between the door and the floor; the part that wears fastest
- Side and top seals: block drafts, driving rain, and pests around the perimeter
- Section joint seals: keep weather out of the gaps between panels as the door flexes
- Threshold seal: a separate floor-mounted strip that pairs with the bottom seal for uneven floors
Signs Your Seals Are Worn Out (and Which Ones Are Urgent)
Most weatherstripping failures announce themselves clearly once you know what to look for. The most obvious is daylight: stand inside your closed garage in the daytime and look around the edges of the door. A thin, even line of light along the very bottom corners can be normal on an uneven floor, but a wide gap, light along the full width, or light streaming down the sides means the seal is no longer making contact. Water is the next big tell. If you find puddles just inside the door after rain or snowmelt, or a dirt line where runoff has been creeping in, the bottom seal or threshold is compromised.
Touch and feel give you the rest of the picture. Worn rubber goes hard, brittle, and cracked instead of soft and pliable; in cold climates it can crack from repeated freeze-thaw cycles, and in hot, sunny regions UV exposure bakes it stiff and chalky. Run your hand along the seal while the door is open. If it crumbles, flakes, or has split open, it is done. A draft you can feel with your hand near the bottom or sides, a sudden uptick in heating or cooling complaints in an attached garage, or new evidence of mice, spiders, or insects getting in are all downstream symptoms of the same root cause.
Here is the critical part for safety. Sometimes a gap at the bottom of the door is not a worn seal at all, it is the door sitting unevenly because something mechanical is failing. If one bottom corner suddenly sits higher than the other, if the door looks tilted or off-track, if you hear a loud bang followed by a new gap, or if the door is suddenly heavy and hard to lift by hand, do not treat that as a weatherstripping problem and do not force the door. Those are classic signs of a broken spring, a snapped cable, or a door coming off its track, all of which are under high tension and can fail violently. In that situation, leave the door alone and request same-day professional help.
- Routine seal wear: daylight at the bottom, water seeping in, brittle or cracked rubber, drafts, pests
- Replace soon but not urgent: a flattened, hardened, or torn bottom seal on an otherwise level door
- Stop and get help fast: door tilted or sitting crooked, sudden gap after a loud bang, off-track door, door suddenly heavy to lift
- Never force a door that has shifted out of square just to close a gap, the underlying spring or cable may be failing
Types of Weatherstripping and Seals
Choosing the right seal starts with knowing what kind of door bottom you have, because the bottom seal must match your door's retainer. The most common modern setup is an aluminum retainer channel screwed to the bottom of the door, into which a rubber or vinyl gasket slides. These gaskets come in profiles named for their cross-section: T-style (one or two T-shaped beads that slot into the channel), bead or P-bulb style, and J-type. Older wood doors often skip the channel entirely and use a nailed-on or screwed-on flat sweep. Getting the profile right is the single most important detail in a bottom-seal replacement, so always measure or photograph your existing retainer before buying.
For the perimeter, side and top weatherstripping is usually a flexible vinyl or rubber flange attached to a nailing strip, often a one-piece product that is nailed or screwed to the door stop molding so the flange presses gently against the door face. Between door sections, replacement panel seals or vinyl inserts handle the flexing joints. A threshold seal is a different animal: it is a heavy rubber or aluminum-backed strip that bonds to the garage floor itself, creating a low ramp the door closes against. Thresholds are the best fix for cracked, sloped, or uneven floors where a bottom seal alone cannot bridge the gap, and they also help keep driving rain and debris from blowing under the door.
Material choice matters more than people expect, and it is genuinely region-dependent. EPDM rubber stays flexible across a very wide temperature range and is the go-to in regions with hard winters, because it resists cracking in deep cold. Vinyl is economical and fine in mild climates but tends to stiffen and crack faster where it freezes. In hot, high-UV regions like the desert Southwest, look for UV-resistant rubber, since sun exposure is what kills seals there. There is no single best material nationwide, the smart choice is the one matched to your local climate's main stressor, whether that is freeze-thaw, UV, blowing sand, or heavy rain.
- Bottom seal profiles: T-style, P-bulb/bead, and J-type for aluminum retainer channels; flat sweeps for older wood doors
- Perimeter seals: vinyl or rubber flange on a nailing strip for the sides and top
- Threshold seal: floor-mounted strip, best for uneven, sloped, or cracked floors
- Material by climate: EPDM rubber for cold/freeze-thaw, UV-resistant rubber for hot sun, vinyl for mild regions
How to Replace a Garage Door Bottom Seal
Replacing a bottom seal on a door with an aluminum retainer channel is one of the few garage door repairs that is genuinely safe for a homeowner, because it does not involve the springs, cables, or any part of the door under tension. The work happens with the door open and the seal at the very bottom. Before you start, confirm the door itself is healthy: it should open and close smoothly, sit square in the opening, and stay put when raised. If anything about the door's movement seems off, stop here, that points to a mechanical issue, not a seal issue.
To get the right replacement, measure the full width of your door and identify your retainer profile by looking at the end of the channel and the shape of the existing gasket beads. Buy the matching seal a little long so you can trim it. The basic process: with the door open, slide or pull the old gasket out of the retainer channel from one end (a little soapy water helps it move), clean dirt and debris out of the channel, then feed the new gasket in, lining up its beads with the channel grooves. Working it in from one end while a helper guides the other end makes it far easier. Trim the excess, leaving a small overhang at each end, and lower the door to check for an even, gap-free seal along the floor.
A few details separate a clean job from a leaky one. Cold seals are stiff and stubborn, so on a chilly day, warming the new gasket in a sunny spot or a warm room first makes it dramatically more cooperative. Soapy water as a lubricant in the channel saves a lot of fighting. If your floor is uneven and a fresh seal still leaves gaps, the real fix is a threshold seal rather than an oversized bottom gasket. And replacing a flat nailed-on sweep on an older wood door is a different procedure: you pry off the old sweep, then nail or screw the new one to the door's bottom edge. Throughout, never disconnect the door from its springs or cables to make the job easier, those stay exactly as they are.
- Confirm first: door opens, closes, and sits level; if not, it is a mechanical issue, not a seal job
- Match the profile: measure door width and identify your retainer channel and bead shape before buying
- Slide out the old gasket, clean the channel, feed in the new one (soapy water and a helper make it easy)
- Warm a stiff seal before installing in cold weather; use a threshold seal for uneven floors
- Never disconnect springs or cables to do this job, the bottom seal does not require it
Typical Costs, DIY vs. Professional, and Maintenance
Weatherstripping is one of the most budget-friendly garage door fixes, which is part of why it is worth staying on top of. As a rough industry guide, a replacement bottom seal gasket is often an inexpensive material purchase, while perimeter weatherstripping kits and threshold seals cost more depending on door width and material. Professional installation adds labor on top of materials. These are typical industry ranges only, not a quote, and your real cost varies with door size, seal type and material, floor condition, and your region's labor rates. Anyone giving you a firm number should do it after seeing your actual door.
The DIY-versus-pro decision is mostly about what is actually wrong. A straightforward bottom-seal swap on a healthy door, or nailing on a perimeter kit, is well within reach for a confident homeowner with basic tools. It makes sense to bring in a professional when the floor is badly uneven and needs a threshold solution, when seals keep failing prematurely (which can hint at a door alignment or balance problem), when you are uncomfortable working overhead, or, most importantly, when the gap is being caused by the door itself sitting wrong. Paying a pro to chase a seal leak that is really a spring or track problem wastes money and leaves the real hazard unfixed.
Good maintenance stretches seal life and keeps you ahead of bigger failures. Wipe the seals down a couple of times a year to clear grit that grinds them away, and keep the threshold area swept so debris does not hold the door open a crack. A light application of a silicone-based lubricant keeps rubber pliable and stops it sticking to a cold floor in winter, just avoid petroleum-based products, which can degrade rubber over time. Inspect seasonally, especially heading into your region's harshest season, whether that is a freezing winter or a blistering summer. And treat any sudden change, a new gap, a tilt, a door that got heavy overnight, as a reason to investigate the door's mechanics rather than just the seal.
- Costs are typical industry ranges, not a quote: bottom gaskets are cheap, kits and thresholds more; labor varies by region
- DIY-friendly: bottom-seal swap or perimeter kit on a healthy, level door
- Call a pro: uneven floors needing a threshold, repeat seal failures, overhead discomfort, or a door causing the gap
- Maintain: clean seals twice a year, use silicone (not petroleum) lubricant, inspect before harsh seasons